How To USB-Charge the Black Diamond Heated Chalk Bag
Warming cold hands, imperfectly
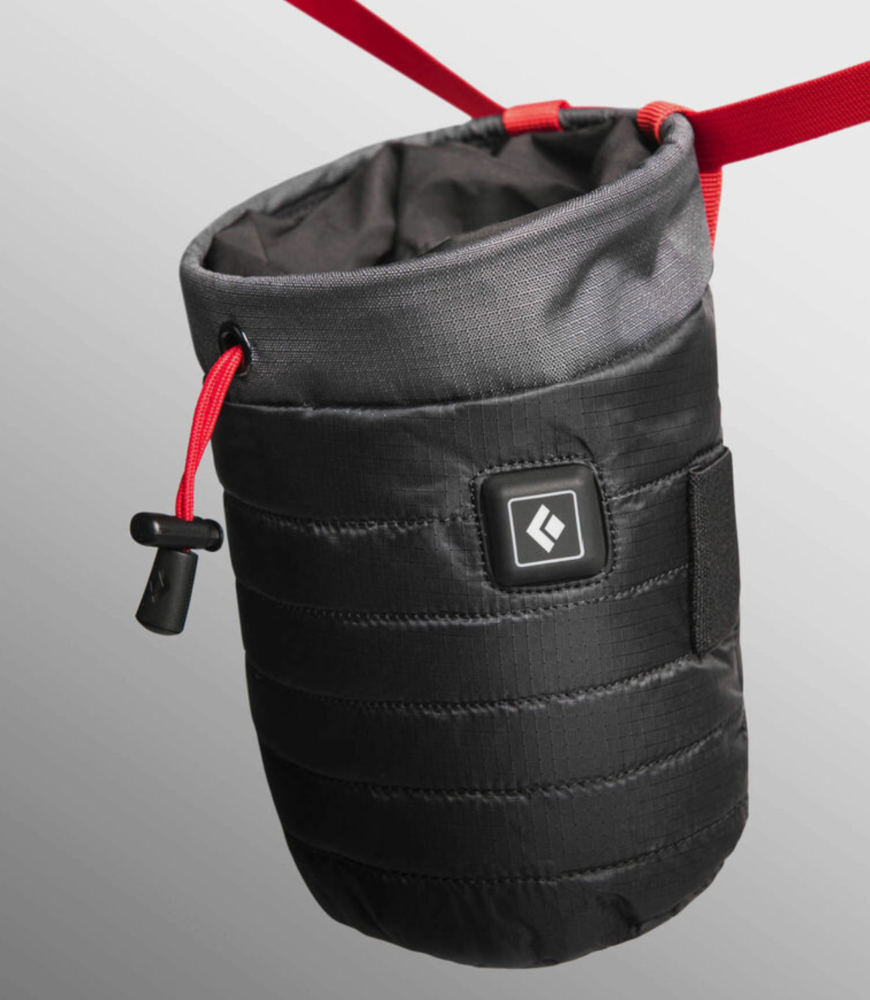
On April 1st 2018 Black Diamond posted a new product on their website: The Hot Forge Heated Chalk Bag. Yes, it was an April Fool joke, but it was also a real product. A $70 chalk bag may feel like an extravagant misappropriation of gear funds for many people, but for some, myself included, it solves a real problem and is easily worth the price. In cold weather, I have chronic problems with my hands numbing out. What good is friction if your cold fingers have 30% of their normal pulling strength? Cold fingers also increase risk of injury.
Unfortunately, this half product, half joke solution suffers from somewhat slapdash design. It is an amalgam of several pre-existing BD materials and technologies. It has a real weekend-project DIY vibe. It reuses down jacket material for the bag itself and the heating element and controller is re-purposed from heated glove and sock products. The battery is a 7.4V 2S Lithium Ion cell charged by an uncommon DC barrel plug size, and nearly impossible to find spares or replacements for. The only option for charging is a clunky wall-wart AC adapter that comes included. And I have already had reliability problems with the heating element, which is made out of a conductive filament that easily fatigues and melts itself to failure through thermal runaway.
The flaws of this product’s design are acceptable to me only due to the absence of literally any other competition or alternative. Not that I’m not grateful. I love it, merely for the fact that it exists at all, and that it solves a real problem. But the BD Heated Chalk Bag is more of a prototype than a finished product.
The Black Diamond Hot Forge Heated Chalk Bag
How to Charge From USB
Probably the biggest annoyance of the BD Heated Chalk Bag is that it requires an AC wall charger. Definitely not very portable, nor camping or crag-friendly! In this article, I will describe a very simple, compact, and inexpensive way to charge your chalk bag’s battery by USB instead.
Disclaimer: Be careful! If you don’t use the correct type of USB charger, you could end up over-charging your battery and create a potential fire hazard. Make sure you follow these instructions carefully. I have conducted several electrical tests on my USB charger setup in the lab, and confirmed that it operates in a safe and correct manner. But I make no guarantees, and if you use a different charger, you’re on your own. Do this at your own risk!
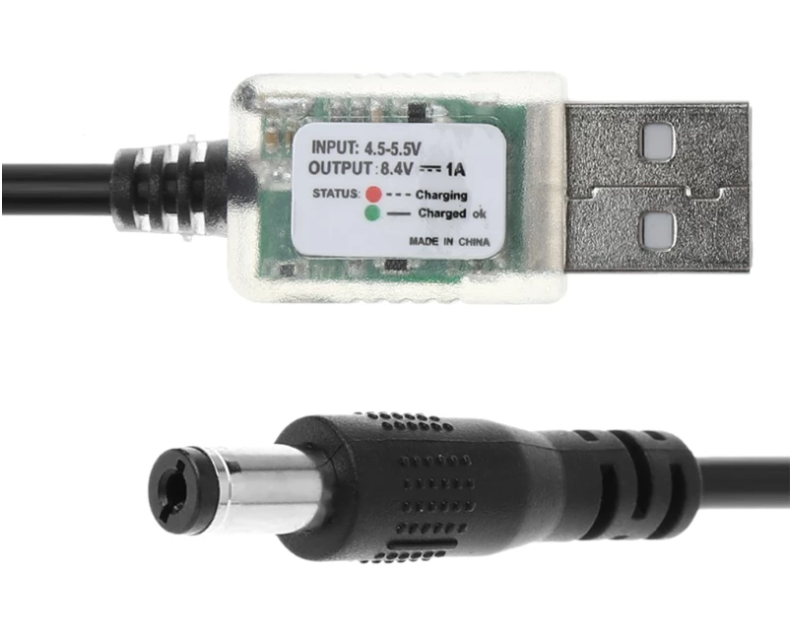
USB 5V to 8.4V battery charger dongle.
Search Amazon or AliExpress for: “USB 5V to 8.4V Power Charge Cable For Bicycle LED Head Light”
Step 1: Purchase a 5V USB input to 8.4V DC output battery charger dongle
I bought the one pictured to the left on AliExpress for $1.43 and can recommend it. Search for “USB 5V to 8.4V Power Charge Cable For Bicycle LED Head Light”. You can also find the same product on Amazon. The dongle is very small and light, perfect for travel. It has a built-in status light that lets you know if it is actively charging (red) or idle (green). At 1A max current, it can recharge your battery to full in a few hours time.
If you decide to buy a different product, be very careful to purchase a dongle that is specifically designed for battery charging. Just a basic DC-DC converter is not good enough, it could overcharge the battery and potentially cause it to explode. It must include a current limiter circuit for charging Lithium Ion batteries.
(Note to geeks: although the battery is a 7.4V 2S Lithium Ion cell, the proper way to charge it is with an 8.4V output. I tested the dongle pictured to the left and have confirmed in the lab with a power supply and oscilloscope that it maintains the correct voltage and correctly limits current when the battery nears full.)
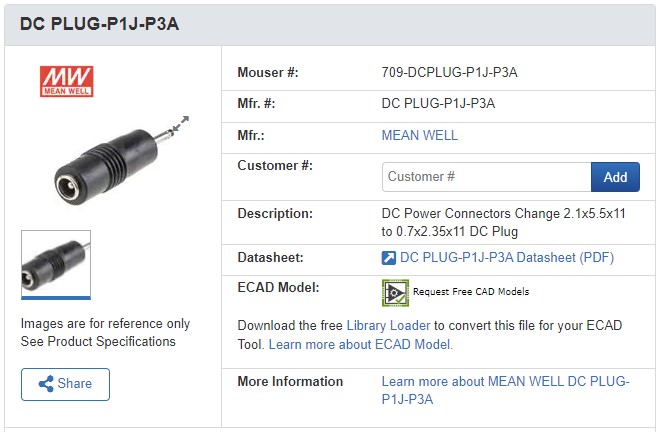
You will need a barrel plug adapter to convert from 5.5 x 2.1mm to 2.35 x 0.7mm.
Shown here is an option from mouser.com.
Step 2: Purchase a 5.5 x 2.1mm to 2.35 x 0.7mm barrel plug adapter
The USB charging dongle from Step 1 outputs 8.4V onto a standard sized “male” 5.5 x 2.1mm barrel plug. The input to the BD battery pack is, from what I could determine, a 2.35 x 0.7mm “female” barrel socket. The first number is the inner diameter of the plug and the second is the outer diameter. Clearly, an adapter is required.
The adapter is not always super easy to find, but it can be found. A viable option on mouser.com is here. You will also find some cheaper options on AliExpress, but be careful! Most of those are actually 2.5 x 0.7mm (not 2.35mm). I ordered some to see if they’d work anyway, and the results weren’t good. The outer diameter of 2.5mm is too large. You can force it, but to avoid damaging the battery pack’s socket you should use a 2.35mm outer diameter plug.
If all else fails, and you can’t find this exact adapter plug, you can also try searching Amazon for “DC power adapter kit” and you will find a few options in the $12 – $15 price range that include a 2.35 x 0.7mm output size. I found that the 2.1 x 0.5mm adapter size can also interface with the BD battery pack, but it is pretty darn loose and finicky so I wouldn’t recommend it.
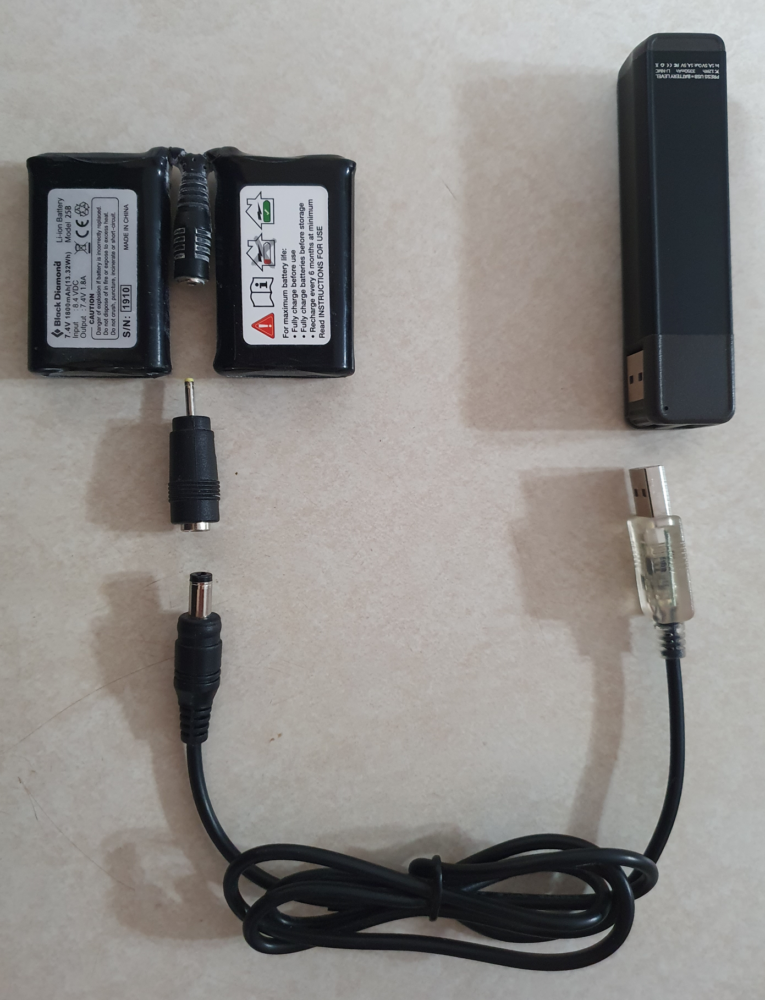
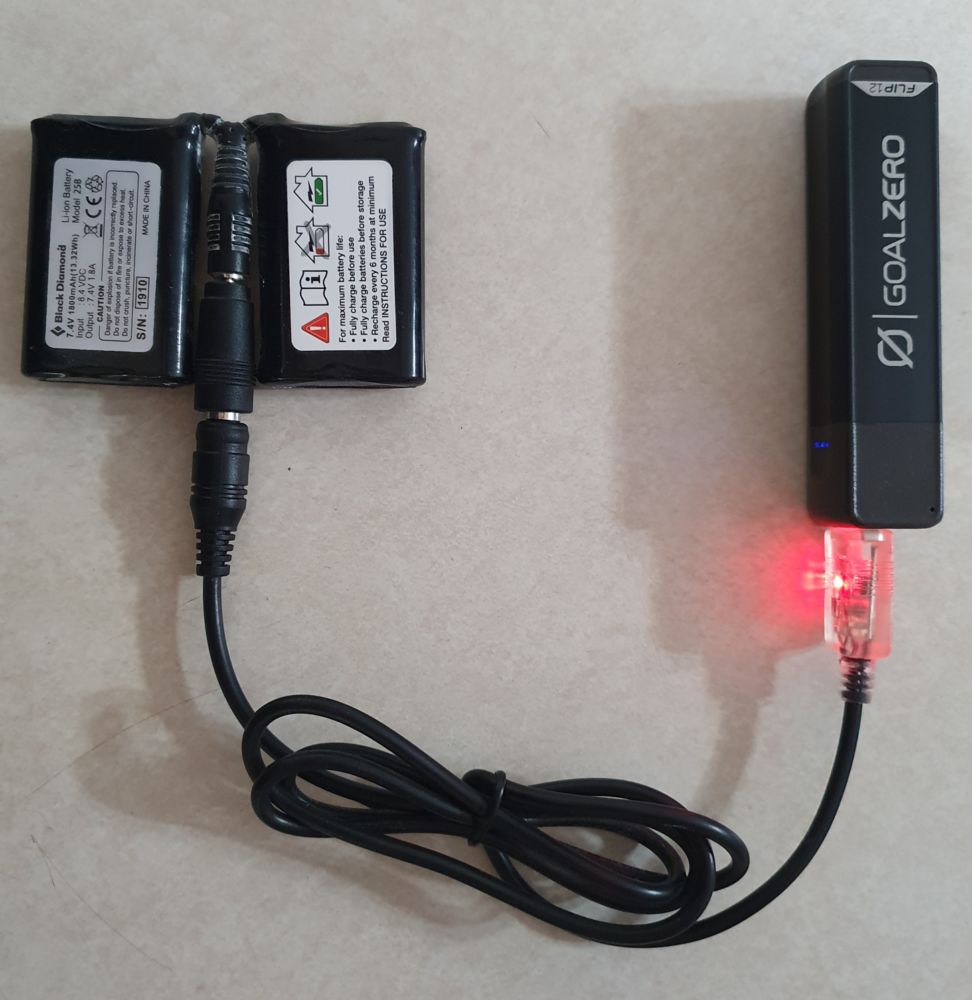
Putting it all together: USB power source -> USB 5V to 8.4V charger dongle -> 2.1mm to 0.7mm barrel adapter -> BD battery pack.
Step 3: Plug it in!
With just those two items, you’re ready to charge the chalk bag battery with any USB power source.
I have been using this method for several years now and have had no issues and am very happy with the upgrade. I don’t need the clunky AC adapter, and I can charge the battery off of just about anything, including USB power bank, solar panel, etc.
And that’s it!
Converting over to USB charging is incredibly straightforward. The main thing you need to be careful about is that the charger dongle you use includes the necessary safe-charging features for Lithium Ion batteries.
Charging the chalk bag’s battery pack with a USB power bank. The red status light indicates that the battery is actively charging.

